Thứ Hai, 30 tháng 5, 2011

MU theme pop up cake and alphabets

HB088

This is another one of my attempts at making quilled alphabets :). Yes, a customer of mine requested me to make a birthday card with quilled alphabets of her friend's name on the card. She insist that the alphabets be in Bookman Old Style fonts. The colors of the alphabets has to be the same colors like the V032 quilled heart card I made before. And the pop up inside, has to be like the pop up Manchester United cake I made in my HB087 felt hearts card.
 
I did have problems figuring out how to do the quilled alphabets at first.....because I didn't know how to make it exactly the way she wanted it to be. So in the end I had to come up with my own way of doing it....something I'm comfortable with. And this is how it turned out :). I'm pretty happy with it and so is my customer. Thank God she likes it a lot hehe! Phew! :D

The part I love the most about this card is the small red seed beads that I glued along side the quilled swirls...I had fun adding them on the card :). From a far it looks like teeny tiny quilled circles but actually they are just seed beads :).


Chủ Nhật, 29 tháng 5, 2011

My first tri-shutter card


Finally!! I did it!! I've been wanting to do a tri-shutter card since last year but it never really turned out the way it's suppose to be! haha! I've looked up in Youtube on how to make it but it seemed so difficult to make and it demotivated me to try it. Until one day I saw for the first time how it's done by my fellow card maker Miss Azilah from Kadkukis or formerly known as CupCakeCraft & Handmade Card during our 2nd Quilling gathering in KL. I was so excited to watch her make her tri-shutter card. She did it really really fast! Seriously! Before you know it, it's done! :) Do check out her blog to see her amazingly gorgeous tri-shutter card at the link above.

For my first try, I did a big one, a half A4 sized card. I didn't decorated much on it apart from pasting different pattern papers I got from a good friend of mine who gave away her paper scraps some time ago to me. Thank you Sandi!! :)  So I used them wisely in this card combining similar shades of blue, orange and green paper. I was thinking of adding some quilled shapes on it but was a bit lazy to do so right now hahahaha. Perhaps in my other tri-shutter cards I'll do that ;).

At first I thought that the tri-shutter card was so thick it wouldn't fit in my handmade envelope, but surprisingly it fits!! Perhaps because I didn't paste anything that's 3D a lot on it. Well, will do more experiments on it for my next try and see how it goes.

I know now that if you really believe in your dreams, you can do it! I sure proved it by making this card and so can you!! ;)


Thứ Tư, 25 tháng 5, 2011

Quilling alphabets

V052

First time ever I got a request to quill alphabets on a card.....and in this case it's a love theme card. My customer was interested in the love birds card with the pop up inside but he wanted me to quill white alphabets instead of having those love birds on the card. And so that's what I did. 

It was pretty tough because I've never done it before.....and didn't know how to go about it. He requested that I spell their names with combination of big and small alphabets "KaMiL <3 SyiMa". Now that it's done, I wish I had done it on a bigger sized card....I feel like this card is a bit small for those alphabets....oh well.....it's already done and I can't turn back....lesson learned.

I hope that I will have more chance to practice quilling alphabets in future on my handmade cards. I feel like it's even more difficult than quilling those love birds :P....seriously! haha! Now I really respect those who can quill alphabets so well. :)

Thứ Năm, 19 tháng 5, 2011

Tool box 2

 
Alhamdulillah......it's all done! I've managed to get all the quilled shapes done today and it's ready to be posted soon. :) I just hope that my customer is happy with it hehehe. :)

I got this order a while back but had trouble getting it done on time due to my ill health. Been sick for quite some time now. One health issue after another. Currently it's fever, flu and sore throat! :(

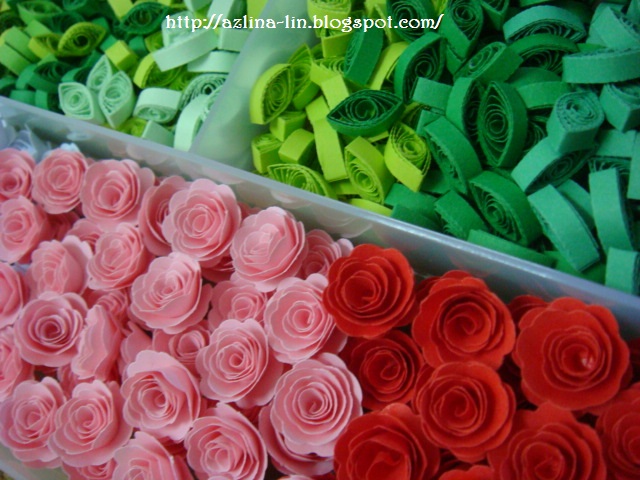
What I love most about this tool box is the lady bugs hehehe.....it's a little smaller than the one I did before for my first tool box.....and the best thing is, I glued black beads on it as it's dots. I love that effect on the lady bug. :) And this is also the first time I made butterflies like this. I mean the middle part of the butterfly....a simple technique and I love it...simple to do and cute :). The ones I did before were too time consuming...hehe.

Here's the list of what's in the tool box:

Lady bugs - 50 pieces
Teddy bears - 21 pieces (assorted colors)
Small butterflies - 90 pieces (assorted colors)
Big butterflies - 21 pieces (assorted colors)
 Leaves - 500 pieces (assorted colors)
 Roses - 150 pieces (assorted colors)


Thứ Bảy, 14 tháng 5, 2011

Felt hearts

HB087

I received a request to design a birthday card using felt as part of the design on the card. I did freaked out a bit when it comes to using felt because I am not an expert when it comes to using felt as embellishments on cards. I've only tried my hand at using them early this year and still have a lot to learn about it. So I did feel a little scared using them especially since it is a little expensive and therefore I can't afford to make mistakes when cutting them up otherwise it would just be a waste.

When my customer told me how she wanted the design to look like on the card, I was worried as well. Arranging 15 circles and 15 red felt hearts on the card and making sure they are arranged neatly on the card is not as easy as I thought it would be. It had to be precised.....I needed to make the correct measurements. I had a hard time figuring out how to cut the felt into heart shapes too and making sure they are the exact same size. I don't have a special machine to cut felt in the same size and so I decided to make a template for it instead. That solved the problem and I managed to get them all in the same size. Yippee! :D I also used the circle template to get those circles for the heart. If I had a circle cutter, then cutting up circles would be a breeze! :)

Another problem was how to write "HAPPY B'DAY ~SYG~" on the hearts. At first my customer wanted me to stick letters sponge stickers on it....unfortunately they were a bit too big for the hearts. So at the very last minute, I got the idea to use glitter glue instead. Yup, they worked perfectly on felt. I never knew that before! I knew that you can use glitter glue on smooth type of fabric but didn't know that it's great on felt as well. Now I know! I experimented some silver glitter glue on a small piece of felt and after 10-15 minutes, they dried so nicely on it! So I finally could write those letters on the hearts as per request. Phew! Another problem solved!

Then I made a small pop up cake inside the card as per request and decided to put the MU logo on the cake itself as she wanted me to add some MU elements inside the card since her BF is a MU fan :). Simple....really simple :) I'm so glad she loved it so much! :) and I love it too! ;)


Chủ Nhật, 8 tháng 5, 2011

Red roses

HB086

I haven't been doing a lot of cards with quilled roses for quite sometime now. So it's nice to be able to get an order to do it recently. I've forgotten how tricky it is to make these. Sometimes it comes out nice and sometimes it doesn't. So I had to make a lot of it and choose the best ones for the card :).

What I love about this card is that for the first time ever, I'm using a gold colored card. Recently I found a really nice gold metallic paper stock and it really caught my eye....I just had to buy it! I've seen some gold paper stock before but I like this one the best...and it's really great for making cards with.

There isn't any pop up designs for this card....so I simply decorated inside the card with tiny red hearts around it. A simple touch. I also drew with a black pen swirling lines at the side of the card.....loved playing with that hehehe.....just simple swirling lines for the roses. I should practice more with the drawing....no matter how nervous I always get when doing it. Afraid of spoiling the card in the process....hehe...well, at least I tried ;).


Chủ Nhật, 1 tháng 5, 2011

Temporarily closed till 6th of May


Hello everyone!

I just wanted to inform my readers that I'll be taking a break for a few days starting today till 6th of May 2011. So I won't be able to entertain any orders till after the 6th. If you wish to book an order, please email me and I'll reply as soon as I can once I get back from my break.

Sorry for any inconvenience and thank you for stopping by!