Thứ Sáu, 25 tháng 11, 2011

New features to old designs

V041 (ADDED WORDINGS & BLACK CARD)
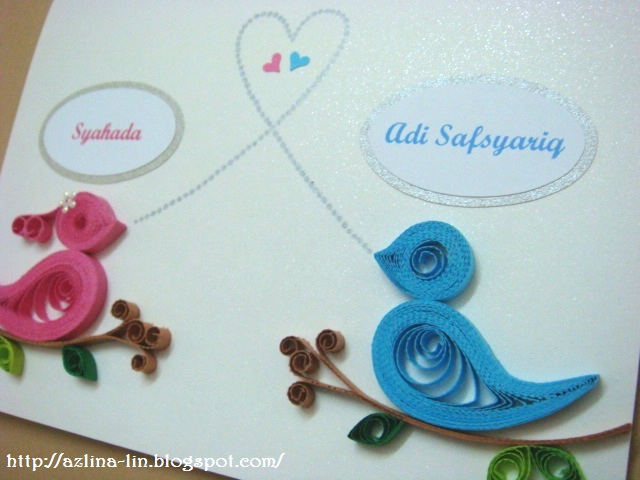

V042 (ADDED WORDINGS)

My V041 and V042 card designs were recreated especially for my customer who ordered these designs for her anniversary celebration. She adored both designs but just wanted some slight additions to it and I agreed to do it as it's just a minor one. The requests were to add names to the front of the card and some wordings inside it, plus the card itself was changed from white to black and the other one from white to metallic white. 

The female bird which is dark pink in colour, I decided to add the "veil" at her head with a tiny white sequin flower just like how I did for my wedding love birds card. So glad my customer didn't mind me doing that for the cards hihihi. Even the quilled birds has a slight change to their body shapes. I love the new shape as it is much slimmer and somehow the inner coils looks more like their wings. You can compare the differences from the old designs and the new ones when you look at the links here -------> V041 & V042. Spot the differences! ;)

Actually, I haven't made these designs for quite sometime now.....and it's nice to be able to make them again....brings  back old memories of making quite a few of the V041 card for my blog giveaways. Come to think of it, I got a lot of practice with quilling when doing those blog giveaways as most of the cards for giveaways are made with quilling decorations on it. :) Good practice for me! ;)

You can view how I make the quilled flower stalk from the video I made below: 


Thứ Tư, 23 tháng 11, 2011

Personalised cards are now closed for orders


Hello everyone!

I have given a lot of thought and I have to come to a decision to make an announcement today that I will be taking a break from taking orders of personalised handmade cards starting from today till further notice. 

As you all know, I'm also selling craft products and that as well has taken a lot of my time away from making handmade cards. I'm struggling to juggle both work at the same time.

However, I do plan to make ready made cards for sale here at my blog and at Facebook in future. Will be showcasing them when all are completed and ready for sale. You will be able to pick your favourite handmade cards at an album in my Fan page or in my blog and buy the cards that I showcase there. 

Truly sorry for any inconveniences and thank you so much for your kind understanding.

Thứ Hai, 21 tháng 11, 2011

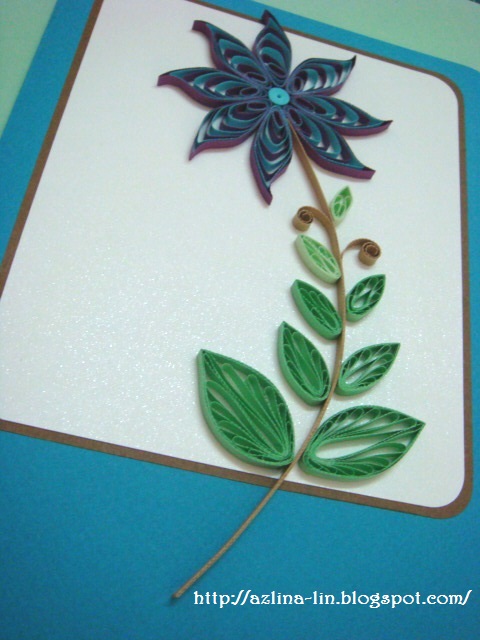
Twisted blue flowers


Played with my quilling comb again last night! hihi! And I made these twisted blue flowers as a result ;D. Remember the previous post where I made the leaves for the Malaysian flower using the quilling comb? Well, I used the same technique for these flowers. The only difference is that I used two different colours in one petal. One dark blue and the other is sky blue :). I just had to try make flowers with this technique. Just had to! haha! I just wanted to see what it looks like as flowers. :)

This card is was not meant for anything in particular.....just playing and it's suitable for any occasion. Will think of what else I can add on later to make it complete. Some wordings or pop up inside. Not sure yet. ;)

I made a video on how you can make the two tone cascading loops flower. Once you know how to make it, you can twist the loops inside it. Do check it out :).


Thứ Năm, 17 tháng 11, 2011

Malaysian flower


Malaysian flower.......yes, that's what it's called :). This quilled flower is originally a creation of Miss Solehah Muhammad, founder of My Quilling Soul. You can view her tutorial on how she makes the Malaysian Flower at the link HERE. Ever since she created this design, so many card designers out there have tried their hand at making this special quilled flower. I myself have never tried making them until a couple of days ago when I had the urge to do so after seeing a friend of mine's Malaysian flower on Facebook :). I just had to try it once and for all! And now I'm addicted to it! LOL! :D

I've always had the impression that it will never turn out nice if I were to use shredded paper. Because all this time I've seen a lot of this Malaysian flower made by other card designers using clean cut quilling paper and they look so beautiful. The quilled design inside each petal can be seen so clearly when using the clean cut quilling paper. So since I myself love using the shredded type that has a lot of rough edges, I thought perhaps there was no point for me to try making them using the shredded paper as I thought it wouldn't look as nice. But after trying it out, I find that it doesn't look that bad after all hihihi. The quilled design inside each petal can be seen quite clearly if done the right way. :)

This is the first time as well for me to make the quilled leaves like that. I used the quilling comb to make  a few cascading loops of different sizes and then, with a slotted quilling tool, I twisted each loop inside each leaf, to the left and to the right :). Pretty easy! Love how it looks! hihi! 

Again I made the layout of this card similar like the card I made previously. I just changed the positions of the frame that's all hihihi! So simple! :D

Here's how I did it the Malaysian flower......first of all, for each petal, I used a shredded paper strip that is 29.7cm in length and and 0.35cm wide and about 80gsm in thickness. I personally prefer to use this type of shredded paper as it's easier for me to form the shape of the petal if it's not that thick. Although a lot of people have used thicker quilling strips for this, but since this is my first time trying it, I thought I should just try the 80gsm instead. Feel free to use any type of quilling strips that you are comfortable with :).

Do check out below the video tutorial I made and also step by step photos on how to make this quilled Malaysian flower ;).


At first I used the circle template as a guide for me to get the exact same shape of coils....but in the end, I just quilled each paper strip and then I let them loose on the cutting board like the photo above. 


Then I gently lift one of the quilled circle with my fingers and like the photo above, I used a bamboo skewer and pressed gently the quilled circle to fold it in half to form the shape of the petal. After that I glued the end of the strip. Then I wrapped a few rounds of the beige coloured shredded paper strip around each of the orange petal quilled shape like the photo you see below. Have fun making your own Malaysian flower!!  :)


Thứ Ba, 15 tháng 11, 2011

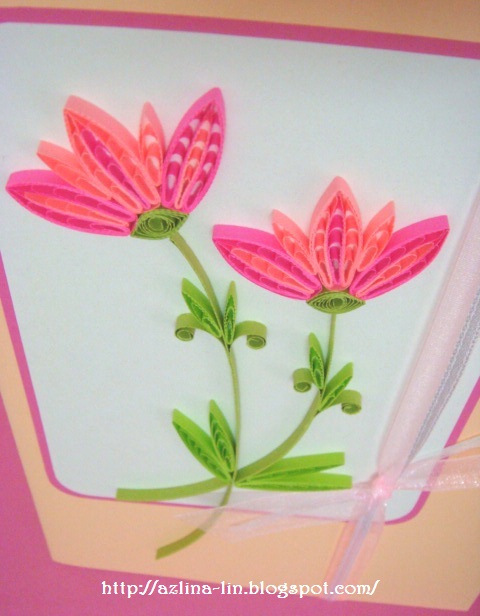
Bright and sweet coloured flowers


I've been playing with the quilling comb a lot lately and been experimenting on new flower designs. Been thinking of what other designs I can do with the quilling comb and I thought of doing something like the above. It's actually a cascading loop technique that I used to make the petals. For one petal, I glued 3 loops together. So, there's quite a few loops to glue together in order to get just one flower. I used 2 different colour quilling strips for the flower. One cyber pink and the other is fluorescent pink. As you can see, I used shredded strips of paper, that's why the flower has those rough edges. I still haven't thought of getting those clean cut ones. Perhaps one day I will but for now, I still enjoy using the shredded type.

As you can see, I seem to love making layouts for my cards this way lately. Perhaps because it's simple and easy to do hihi! No other reason. :D The plain white metallic background highlights the flower designs and puts them in a frame. So the eyes are focused on just that particular part of the card. I was thinking of doing more to it but not just yet. Just enjoy making the flowers and leaves first and think of the rest later ;).

Thứ Bảy, 12 tháng 11, 2011

Bookmarks for Shruti & Ritesh

BM018


BM019


A request I received from a dear customer about 2 months ago to make some handmade cards and paper beaded bookmarks for her and dear husband. I took such a long time to get them done, but finally they are all done and ready to be posted. I'm so happy about that. I wish my customer didn't have to wait so long. Luckily for me my customer is such a sweetie. Such a patient customer she is. One of a kind :).

She was very much interested in my paper beaded bookmarks, especially the ones I made that has carved names on them. She requested for her name and hubby's on the bookmarks. One red and the other blue. The bookmarks are quite big in size, about 19.4cm x 7.7cm. I couldn't make them smaller because of the size of the letters and the carved out shapes around it that won't fit in a smaller size bookmark. 

I put extra beads as well for each bookmark since the size of bookmark is bigger. The more the merrier :). 


Thứ Sáu, 4 tháng 11, 2011

Sweet Leaves - Quilling Blog Hop


Hello!! Welcome to the Sweet Leaves Quilling Blog Hop at Lin Handmade Greeting Cards! I'm blog number 6! If you have just hopped from Anastasia's blog then you are on the right track! hihi! 

This is my second time participating in Leesandra Diaz's quilling blog hop! So exciting! 22 quillers from across the globe are participating in this wonderful event. This time around the theme for the blog hop is  "Leaves".

I didn't know where to start or how to go about it at first but being a card maker, I ended up making a quilled card after all in the end as it's something I'm familiar with hihihi.....plus I wanted to do this new technique I've learned using the quilling comb, which is my new love in my life hahaha. Yup, I love this new quilling tool. I've been experimenting a lot with it ever since I bought it and learning new techniques that I can do with it. I just love seeing the patterns made using this quilling comb on the card :).

I first got the idea to do the quilled leaves from Leesandra Diaz's post regarding the different types of leaves we can make for this theme. And she showed a PHOTO of Sonali's creations of quilled leaves that caught my eyes. I immediately wanted to try one of the techniques and I changed it a bit to make it my own :). I'm really loving it!

I made a very simple layout for the card and only made one quilled flower using the cascading loop technique and some quilled leaves attached to it. Just a simple design to showcase the quilling comb patterns. No ribbons, no fancy embellishments whatsoever. Just a simple, clean cut design, just the way I like it :).

Thank you for hopping by here and viewing my card design and the next blog in line to hop to is Thusitha's blog! Check the list below! Have fun blog hopping! :)


NORTH AMERICA 
Leesandra Diaz - http://sweetspotcards.blogspot.com/ (START OF THE BLOG HOP)


AFRICA


ASIA

YOU ARE HERE (Lin) http://azlina-lin.blogspot.com/


HOP TO THE NEXT BLOG BELOW:


EUROPE


NORTH AMERICA


AUSTRALIA


SOUTH AMERICA