


OK!!!! After watching that dry embossing video tutorial yesterday, I decided to give it a try at dry embossing using a brass stencil. I only have one of these beauties hehehehe. I bought this brass stencil at Craft Haven, One Utama. They have so many varieties of brass stencils there. You will be spoilt for choices! I on the other hand didn't have enough money at the time to buy the different patterns.....huhuhuhu......so I only bought one....for my collection....booohooohooooo so sad :(.
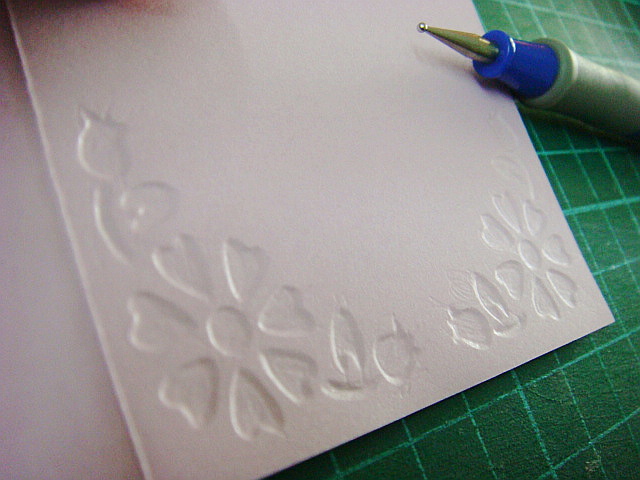
Anyways! Back to the experiment heheehhee......as you can see from the photos I lined up above.....you can view the step by step process of the dry embossing technique I did. First I chose the pattern on the brass stencil that I would like to have embossed on the four corners of the small gift card. I then chose a paper that is not too thick and light in color for me to see through the image of the patterns on the brass stencil behind the card. If it's too thick then it would be difficult to see through it or to emboss the patterns.
I emboss the chosen pattern one by one on each corner of the card. And tadaaaaaaaaaaaaaaaaaaaaaaa!!!! It's done! Now all the corners have that embossed flower pattern on the card. It's not that hard to do and it only takes a few minutes to get it done. :) BUT....if I had a light box like the one shown in the video tutorials, it would be much faster and easier for me to do it. And there won't be a lot pressure marks on the card like the one I made. I was basically pressuring the paper with the stylus blindly coz I couldn't see the patterns of the stencil behind the card....hehehe. Perhaps I can find a better solution to this later on....but for now, this is how I did it...... :).
Không có nhận xét nào:
Đăng nhận xét