Hiển thị các bài đăng có nhãn Quilled flower arrangement. Hiển thị tất cả bài đăng

Thứ Ba, 26 tháng 8, 2014

Green theme quilled wedding signage

WS002

Alhamdulillah....thank you Allah for blessing me for the strength and energy to finish this project. I'm so thankful too to get a customer who is so patient and understanding. For her kind patience, I am able to finish this order in time before her wedding day which is coming soon this week.


I admit I am pretty late at completing this order, but still I'm glad I did it before the due date. You have no idea how I had to struggle to finish it. I haven't been quilling for more than 2 months and it was kinda awkward to start again. Felt a bit rusty hahaha.....but after a little practice I was ready again to start the project. 

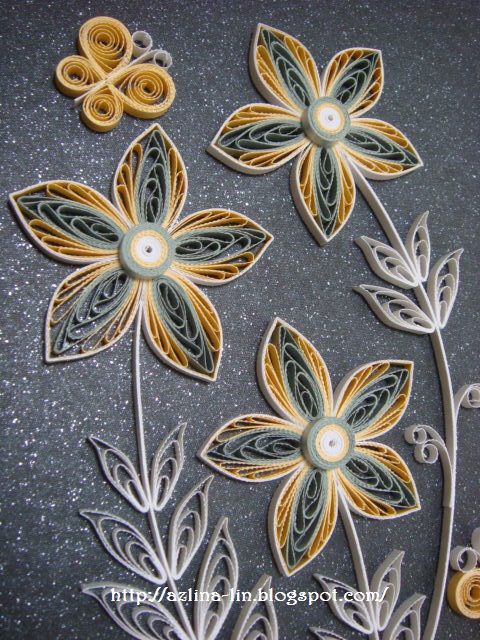
This design for this wedding signage was actually inspired by one of my swing cards that I did this year. You can view it at the link HERE. My customer just loved the design so much and wanted me to use the same design for her wedding signage. 

The original design on the swing card, you can see that the leaves were made from die-cut patterns. So since she loves quilling so much, she wanted me to do the leaves using the quilling technique. I've never done something like that before....so it was fun to be able to try that. And I love the outcome :).

All in all, I'm really glad I did this project no matter how I felt. Not sure when I will be quilling again though....because I'll be busy after this with sewing beads project! hehehe! Yes....it's a little wedding project that I was entrusted to do for someone. Will do an update on it probably on my FB page.....will see how it goes. ;)

Here is a photo of my customer and her husband on their wedding day with the wedding signage I made....photo was taken by Zulhilmi Photoworks....click on the link to see their other beautiful wedding photos ;)

Thứ Bảy, 11 tháng 5, 2013

Quilled flower arrangement for wedding

WS001

Another first attempt for me! Yes, this is the first time I had to make a quilled flower arrangement that will be pasted on a wedding guestbook. I was a bit unsure of doing this at first since it's not my favourite thing to do. But after much persuasion and thought, I decided to give it a try. At least once in my life, I would try to make one.

After accepting the offer, I had quite a hard time deciding on the type of flowers I would make. My customer did requested that the flowers be arranged around the rectangular board so that it would look like a frame and then add some wordings at the center of it. She also wanted the colour combination be all in pastel colours and all the wordings in brown colour. So all I had to do then was to decide on what type of flowers I would make.

I've done a lot of quilled Malaysian flowers and Husking flowers for my quilled frames before so I didn't want to do the same thing again for this one. After much thought I decided to make the Lovely loops flower. It's something I rarely make and it's quite difficult to make as well. It was a good challenge for me. And for the first time too, I made them in two different sizes.

Oh yes! This is also the first time for me to try make those chubby butterflies! ehehe! I love them! It was really fun to make them. I saw a tutorial on how to make them on Pinterest long time ago and been wanting to make them for so long now but been too busy to try them out. So I thought that this would be the best time to give it a try since my customer did request for me to make a couple of butterflies for the quilled flower arrangement.

If you would like to try and make those Lovely loops flower, you can view my video tutorial below on how to make them. ;)


Thứ Ba, 15 tháng 1, 2013

Gold, silver and a bit of red!

QF010

Ok.....so here it is.....the gold and silver flower photo frame I mentioned in my previous post. I added a couple of birds for this flower arrangement. At first I thought it was not possible to do so since most of the time I make my quilled birds quite big in size and probably won't fit in nicely on this half A4 size photo frame. But since my customer requested it and wished to have some birds in either of the photo frames, I decided to give it a try by making them smaller in size.

The request from my customer was that I must think of a colour for the design that would  match with gold and silver. I used to make gold and silver flower arrangement before.....it was a combination of white, black, gold and silver and those colours seemed like a perfect combination but when I had to think of what would match just gold and silver, it was tough......until it came to me how red would seem like a good match for those two colours. Bingo! :D

But later after that, I was a bit confused when it came to decide on what colour to use for the leaves of the flowers......somehow green doesn't seem to match the gold and silver.....so in the end.....I decided to make some swirls as part of the decoration for the flowers.....and swirls can be of any colour.....and that's when I decided that they would be in gold and silver too! hehe! The idea of adding those tiny gold sequins was just something I dared myself to do.....I wasn't too sure about it and started to treat my photo frames like how I treat my handmade cards by doing that. :P

For me, the important thing is I have to be happy with the results of my artwork before I show it to my customer......as long as I'm happy with it, then it'll be ok.....and sure enough it is coz my customer was happy with it.....so it's a bonus when that happens......coz sometimes it doesn't happen that way..... you can't please everyone right? hehe......I'm just glad that I'm happy and she's happy..... hope everyone is happy too today! ;)


Chủ Nhật, 13 tháng 1, 2013

Tiny loops flower photo frame

 QF009

Last year I accepted an order from a customer who wanted me to design 2 different quilled flower photo frames for her......and she gave me the freedom to design it any way I like it.....but she did have a request for one of them to have some silver and gold colour in the design. I've done that already and I shall be blogging about the silver and gold photo frame in my next post.

Actually I didn't want to take any more customize orders since last year because of my ill health. But I accepted this one because she was willing to wait for a few months for me to get it done for her.....so I could take my own sweet time to get it done....no rush, no stress and I liked that very much hehehe... :). I just want to be able to design whatever I like and sell my designs to those who fancy them. Easier for me considering my current condition. 

At first when I received this order, I had a hard time deciding which type of flower I wanted to make for the frame. Then I decided to use this tiny loops flower design since I haven't made them for quite a long time. I've forgotten how much fun it is to make them using the hair comb. I used to make them in multicolours, in single colours and now I made them in two different colours....soft pink and aqua blue. I love the combination a lot :).

The leaf design......hehe....I had a hard time deciding which type of leaf that would be suitable for the flower.....I made a few types to choose from and finally I seemed to like this simple slim tear drop shape instead of the other types I tried making to suit the flowers. I don't know why but I really like the combination of the two design together. They just looked good together. Well, that's just my opinion.... ;)

My customer did insisted that I add some butterflies or birds in any of the two designs......so for this one I chose butterflies to go together with the flower arrangement. I'm so glad that she loved them so much ^.^. Mission accomplished!


Chủ Nhật, 11 tháng 11, 2012

Purple and pink Malaysian flower

 QF008

Been a while since I last posted anything new here......been so busy with work and juggling with my crazy health issues......it's been a very challenging ride.

Anyways......here is something I did recently for a customer of mine.......he requested for an arrangement of Malaysian flowers to be made on a photo frame......and insisted that the flowers be in a combination of pink and purple. I've never done Malaysian flowers in two tones before.....so I guess this was a first for me. It was interesting......and challenging as well since I had to experiment on the different types of pink and purple that would actually look bright and cheerful for the frame.....and after some experimenting, I finally found the colours that would please my eyes hehehe. I hope it pleases your eyes as well........ ;)


Thứ Ba, 18 tháng 9, 2012

Alphabets in photo frames

QF002 (With alphabets)

Look familiar? Yes, it's an old design but with a new twist to it :). There is a slight addition to it as per request from my dear customer. Yes, I've added some foam alphabets and a multicoloured quilled heart to it. Actually,  I was supposed to make quilled alphabets. But unfortunately I'm still not good at making them huhuhuu... :(. I've tried a few times but failed because the alphabets that I tried to make were a bit too small. Perhaps if it was a little bigger in size, I would be able to do it. I'm still not good at it yet >.<. Must practice more!

I had no problem remaking the quilled flower arrangements on the photo frame except for the quilled alphabets. Thank God I had those foam alphabets at hand. They really saved the day! hehehe! Lucky for me, my customer didn't mind it at all when I wanted to use them for the frames. She is so sweet!! ;) This is the first time I'm using the foam alphabets. I bought them some time ago so that I can use them for my handmade cards but in the end, I used them for these photo frames instead. Perhaps one day I'll use them for my handmade cards. I still have no new ideas yet for that. It will come to me soon.....the ideas will come....I just don't know when...... hahahahaha :D.


Thứ Bảy, 5 tháng 5, 2012

Shades of blue on black

QF004

:D another quilled flower frame of the exact same layout design as the ones I've done before but this time the flowers are in shades of BLUE!!! My favourite ;). You must be wondering why I added some shades of pink as well in this design......well, first of all, my customer was the one who suggested it.....second of all, I thought that the blues were too blue and it needed some bright colours to cheer them up! hehe! And sure enough they did! ;)

This quilled flower frame is actually for my customer's husband....it's for his birthday :). Hope he likes it. She also ordered a handmade card together with this quilled flower frame. I will blog about it soon ;)


Thứ Năm, 12 tháng 4, 2012

Red and pink on black

QF003

Look familiar? Ahahaha.....yes, it's the same design like the quilled flower frame I made before except that this one has a black background and it stands horizontally. I made this especially for my customer exactly like she requested it. The size of the frame is half the size of an A4 paper and can fit a 4R photo in it. 

Actually both of us weren't too sure about the background colour. We were kinda afraid if the black background wouldn't look as nice as the white one if the flowers and leaves were the same colour. But luckily it turned out alright and I actually changed only one colour from the original design which is the dark green colour. I changed it to teal instead. It's a little lighter shade of green compared to the dark green....it's kinda like blueish green. 

I've been pretty busy with work lately and because of that it took me quite some time to finish making this frame. I guess I just don't have much time anymore these days to create. Been spending too much of my time on selling products for quilling instead. But at least I'm making others happy by giving them a chance to create their own artwork instead of just admiring mine hehehe. Now they can create their own beautiful designs and make their loved ones happy. Love making people happy....as it makes me happy too ;)


Thứ Hai, 26 tháng 3, 2012

Paper photo frames with quilled flowers

QF002

Another first for me! Yup! It's the first time for me to make my own photo frame using mounting boards :). It was not quite as easy as I thought it would be when I first started making them but it was quite ok in end. These photo frames were requested from a customer of mine. She wanted me to buy a couple of white wooden photo frames and decorate them with quilled floral arrangements. Since I couldn't find any here in Alor Setar, so she gave me an option of making the frames using mounting boards instead. 

I did search for white mounting boards but the surface of the mounting board was not pretty. So I layered it with a better quality white metallic paper instead. Ting! hehe! You see, by doing this, I can always have any kind of colour on the photo frames. I also pasted a transparent plastic sheet inside the photo frame to protect the photo.:)

She gave me the freedom to decorate both frames any way I like...it's all up to my creativity, but she did requested that the flowers be in red and pink combination. So that's how it all started :). I was kinda confused at first in choosing the type of flowers that I should be making for the decorations. That's what happens when you have too many flowers to choose from haha! In the end, I decided to do the Malaysian flower and also the Cascading + husking flower :). 


QF001

I made the Malaysian flower photo frame first and I think I love this one more than the other one hehehe. I love the flowers and the leaves as well. Can't help it. Love the Malaysian flower more coz the petals of the flowers looks chubby and cute haha. :D

Thứ Năm, 16 tháng 2, 2012

Quilled flower arrangements in gold, silver and white


Ok! As promised in my previous post. Here are the close up photos of the quilled flower arrangements project that I made for my students. :)

This is my first try at making a quilled flower arrangement on an A4 size board. I was actually inspired by my quilling students who loved to make their quilled flower arrangements on boards. They made it in smaller sizes and I thought it was a really nice idea to do something similar with a different twist to it. I made it using just 3 different colour strip of paper.....gold, silver and metallic pearl white paper strip. All the quilling strip used for this quilled flower arrangement were made using papers that were shredded using the mini paper shredder. I chose a thicker type of paper for this project as the paper available were a bit thicker compared to the other quilling strips I've used before.

Since the board itself was quite plain and didn't have a nice background for the quilling arrangement I had in mind, I decided to paste on it an A4 size paper that had a metallic silver sparkle to it's black background. It seemed perfect for my idea. 

For this one, I made a new flower pattern for it. Not sure what to call it hihihi. I've never made something like it before on any of my card designs. It's something new I created using the quilling comb. I really like the middle part of the petal....the silver part...and I did a husking technique on both sides of the silver part then wrapped it with a metallic white quilling strip. The first time I made it when I was experimenting with the new idea, I only made the silver part as a petal by itself. Only later on that I decided to combine it with the husking technique. I love the combination of the two techniques :).


I don't know why but I've always loved to arrange flowers this way. Love seeing it slanting to one side....either to the left or to the right. For this one I made the Royal flower patterns but with the husking technique inside that has two different type of colour paper....gold mixed with silver. I just love doing this type of combination. I love the leaves I made for this flower arrangement too! I made it using the combing technique and see how the loops are so close to each other?? That's because I used a really small hair comb ;). 

I hope to have the time to make more projects like this in future. Perhaps something more complicated, something more challenging. I always have difficulty trying to do that because I always end up making it look so simple. ;)