Hiển thị các bài đăng có nhãn Quilled butterfly. Hiển thị tất cả bài đăng

Thứ Bảy, 11 tháng 5, 2013

Quilled flower arrangement for wedding

WS001

Another first attempt for me! Yes, this is the first time I had to make a quilled flower arrangement that will be pasted on a wedding guestbook. I was a bit unsure of doing this at first since it's not my favourite thing to do. But after much persuasion and thought, I decided to give it a try. At least once in my life, I would try to make one.

After accepting the offer, I had quite a hard time deciding on the type of flowers I would make. My customer did requested that the flowers be arranged around the rectangular board so that it would look like a frame and then add some wordings at the center of it. She also wanted the colour combination be all in pastel colours and all the wordings in brown colour. So all I had to do then was to decide on what type of flowers I would make.

I've done a lot of quilled Malaysian flowers and Husking flowers for my quilled frames before so I didn't want to do the same thing again for this one. After much thought I decided to make the Lovely loops flower. It's something I rarely make and it's quite difficult to make as well. It was a good challenge for me. And for the first time too, I made them in two different sizes.

Oh yes! This is also the first time for me to try make those chubby butterflies! ehehe! I love them! It was really fun to make them. I saw a tutorial on how to make them on Pinterest long time ago and been wanting to make them for so long now but been too busy to try them out. So I thought that this would be the best time to give it a try since my customer did request for me to make a couple of butterflies for the quilled flower arrangement.

If you would like to try and make those Lovely loops flower, you can view my video tutorial below on how to make them. ;)


Thứ Ba, 18 tháng 9, 2012

Alphabets in photo frames

QF002 (With alphabets)

Look familiar? Yes, it's an old design but with a new twist to it :). There is a slight addition to it as per request from my dear customer. Yes, I've added some foam alphabets and a multicoloured quilled heart to it. Actually,  I was supposed to make quilled alphabets. But unfortunately I'm still not good at making them huhuhuu... :(. I've tried a few times but failed because the alphabets that I tried to make were a bit too small. Perhaps if it was a little bigger in size, I would be able to do it. I'm still not good at it yet >.<. Must practice more!

I had no problem remaking the quilled flower arrangements on the photo frame except for the quilled alphabets. Thank God I had those foam alphabets at hand. They really saved the day! hehehe! Lucky for me, my customer didn't mind it at all when I wanted to use them for the frames. She is so sweet!! ;) This is the first time I'm using the foam alphabets. I bought them some time ago so that I can use them for my handmade cards but in the end, I used them for these photo frames instead. Perhaps one day I'll use them for my handmade cards. I still have no new ideas yet for that. It will come to me soon.....the ideas will come....I just don't know when...... hahahahaha :D.


Thứ Năm, 23 tháng 2, 2012

3 tone flower bookmark


A simple bookmark made for my customer.........simple and sweet ;) Focusing more on the flower itself.....rather than on other things on the bookmark. So the flower is the first thing you would look at when you look at the bookmark.

I used the quilling comb technique for the leaves and flower.....can't help but be obsessed with that technique these days :).


Thứ Năm, 28 tháng 7, 2011

Red theme quilled butterfly and quilled hearts

BM013

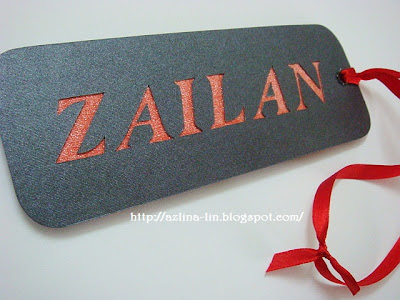
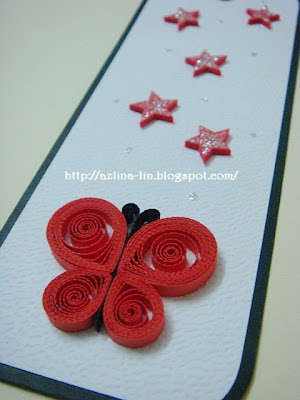
Red theme quilled butterfly bookmarks with tiny quilled hearts :). A request I got from my customer who wanted me to combine a quilled butterfly and tiny quilled hearts in one bookmark. One for herself and the other for her loved one....so sweet hehe. Both bookmarks has their names engraved at the back of it as well. I cut out their names by hand. :)

These bookmarks have a different function. Not for marking books but for her to hang it in her car and  in his car as well......hang them at the top view mirror hehehe. That is why I tied the ribbons with a knot at the ends that way. Not sure if the length of the ribbon is enough though to go through the top view mirror. I  forgot to check these things out before I tied the ribbons to the bookmarks. Sigh.....hope it works out...


I love the paper I used for the back of the bookmark. It's a dark gray metallic paper. Love the way it shines when it hits the light. And it sure does have a good contrast with the red color too. Loving it! :)


Thứ Sáu, 24 tháng 6, 2011

Tool box 3


I've just finished making another batch of quilled items for my 3rd tool box yesterday. I think this will be the last tool box I'll be making because I need to concentrate on other projects in the next few months. Making these quilled items for the tool box is very very time consuming as you all know. And if I were to make another one, it will probably be for me hehe! Coz I would like one for myself as well haha! :D

It's a big relief to be able to get this tool box done and I am really in need of a holiday. I will be taking one soon next week and I'm just counting the days now. Been working non stop for two months straight and it's nice to take a long break for a while. Want to go hunt for new supplies as well. Visit new craft stores and feast my eyes with beautiful things hehe! Do fun stuff with friends too! :D
So I will be away till 4th of July and will resume back to work on the 5th. Have a good weekend everyone! ;)

Thứ Bảy, 18 tháng 6, 2011

Quilled butterflies bookmarks

BM009


BM010


BM011


Recently I received another order to make some bookmarks with butterflies and stars as the subject matter. My customer requested that the butterflies be in brown and soft purple in color. At the last minute she requested one more bookmark but with a color of my choice and I chose red! :)

It's a very simple design as you can see....and the stars were made using colored foams which I cut out myself. I wanted to make quilled stars and almost succeeded in doing so but I felt like they were not good enough. I still need some practice in making them so that's why I decided to use foams instead. And I decorated the stars with silver glitters. Love that effect on the star foams. :)


Thứ Năm, 19 tháng 5, 2011

Tool box 2

 
Alhamdulillah......it's all done! I've managed to get all the quilled shapes done today and it's ready to be posted soon. :) I just hope that my customer is happy with it hehehe. :)

I got this order a while back but had trouble getting it done on time due to my ill health. Been sick for quite some time now. One health issue after another. Currently it's fever, flu and sore throat! :(

What I love most about this tool box is the lady bugs hehehe.....it's a little smaller than the one I did before for my first tool box.....and the best thing is, I glued black beads on it as it's dots. I love that effect on the lady bug. :) And this is also the first time I made butterflies like this. I mean the middle part of the butterfly....a simple technique and I love it...simple to do and cute :). The ones I did before were too time consuming...hehe.

Here's the list of what's in the tool box:

Lady bugs - 50 pieces
Teddy bears - 21 pieces (assorted colors)
Small butterflies - 90 pieces (assorted colors)
Big butterflies - 21 pieces (assorted colors)
 Leaves - 500 pieces (assorted colors)
 Roses - 150 pieces (assorted colors)


Thứ Bảy, 9 tháng 4, 2011

Quilled designs in tool box


I received an unusual request recently from a customer who wanted a variety of quilled designs in a tool box. I had trouble finding the exact same tool box like the one I've shown here in my blog a while ago as it was out of stock at the shop. I had to search for another type that would be suitable for this order. Finally I found one that is suitable to be used to store quilled designs in it. Although it looks smaller but the amount of quilled designs that can be filled up in it surprised me. I love this tool box better than the one I bought earlier because of the space it gives me especially if I wanted to keep bigger quilled designs in it. It's wonderful :).

I decorated the tool box with paper flowers and leaves on top of it to hide some text embossed on the tool box itself. :) The tool box is actually a tool box for putting in fishing tools hehehe. But it's great for  storing quilled designs as well! ;)

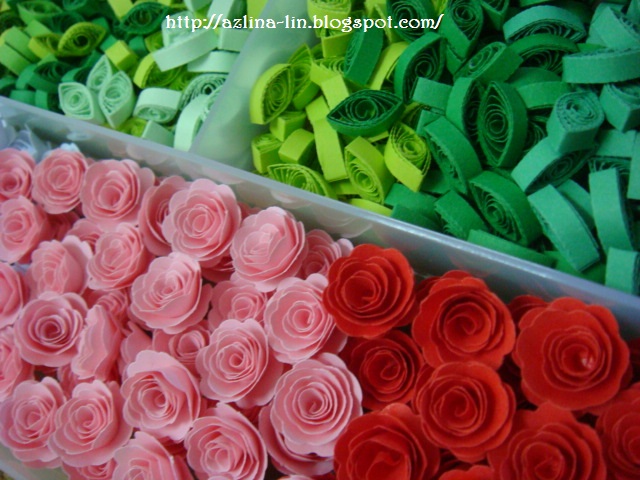
For this order, I get to do some new quilled designs that I've never done before for instance like the quilled ladybugs, quilled sunflowers, quilled fringed flowers and multicolored quilled butterflies. I made so many  mini teddy bears....altogether 27 of them in 3 different color brown paper. About 200 pieces of leaves.....more than 50 multicolored roses.....15 butterflies.....11 ladybugs, 40 multicolored heart shapes, and definitely more than 50 pieces of other different types of flowers. Phew! One tool box filled with quilled designs like this can  be used to produce so many different card designs :).

Making these quilled designs was a good experience for me and I really hope my customer will love what I have created for her. I felt really sad to see it go actually...hehehe.....I wish I could keep it for myself. LOL! I think I should get another one of this tool box and make the same quilled designs for myself hehehehe..... ;)


Thứ Sáu, 21 tháng 1, 2011

Blue butterfly

AO052

My second quilled butterfly! And it's blue! Sweet soft blue hehehe... ;)

Actually, this design is a request I got from a customer who was interested in 3 of my previous card designs. So I was asked to combine 3 different designs into 1! hehe! She was interested in my first quilled card which was a simple flower design I made using tight coils. You can view the card HERE.

She was also interested in the quilled butterfly that I made in the butterfly card at the link HERE . She wanted me to add it in this new card design. So I did as per request but changed the colors because she wanted pastel colors for her card. It's actually suppose to be a birthday card but I decided to publish it first before adding the wordings because I kinda like the card as it is without any wordings on it hehe! :)

The pop up design inside the card is actually from a thank you card that I made long time ago which she love so much and wanted me to add in this card. You can view the card at the link HERE. It's the same design but I changed the colors to match the colors of the quilled flowers. I must admit since I haven't done this pop up design for quite a while, so when I had to do it again, it was pretty tough! hehe! I've forgotten how to do it! LOL! :D Lesson learned!

I kinda like how the quilled flowers look like now compared to the ones I made the first time because the tight coils I made now looks much neater. I realised my earlier mistakes and tried to make it better this time. I also like the leaves I made because it's a combination of two different colors for each leaf. This is the first time for me to use this kind of technique. It's kinda tricky the first time but after doing it for a while, it's fun, fun, fun! :)